How to convert image files in HEIC format to JPEG format
JULY 22ND, 2023
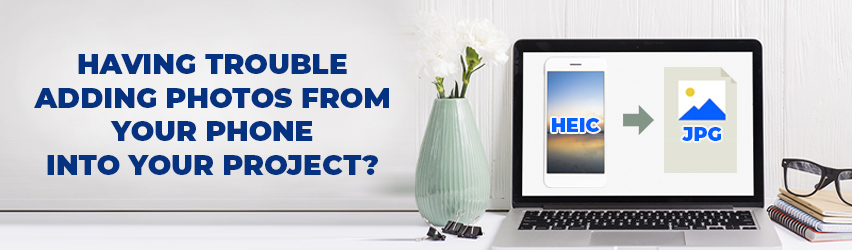
If you're having trouble adding your photos into your project chances are it’s because they are in the new HEIC format. Read on and find out how to convert them back to standard JPEG files.
HEIC is the new kid on the block.This file format for photographs was introduced by Apple for iPhones but is now also being used on some Android phones. It's useful because it offers high-quality images at half the file size of JPEG. But alas, not all Apps are mates with HEIC yet, including our Photo Book editor. So, here's how to convert those HEIC files into the friendly and universally accepted JPEG format.
For Windows Users:
If you only have a few files to convert, the easiest option is an online converter. If you’ve got a large number of files to convert, we’d suggest downloading a program to your computer so that you can convert them in bulk.
1. Using a Free Online Converter
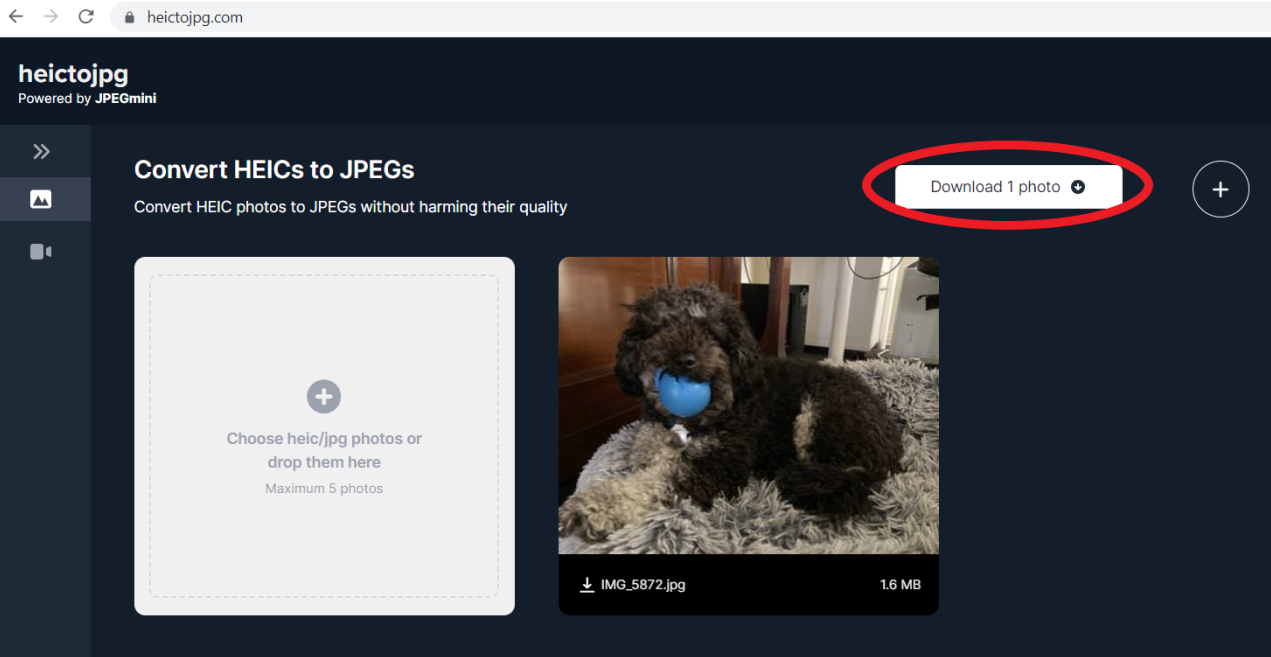
- You can use free websites such as www.heictojpg.com or www.convertio.co
- Upload your HEIC files on one of the above sites and it will automatically convert your files to JPEGs. Then simply click on the ‘Download’ button to download your new JPEG images to your ‘Downloads’ folder.
2. Downloading a Program
- The best solution we have found is the free downloadable app called "CopyTrans HEIC" which you can download from https://www.copytrans.net/copytransheic/
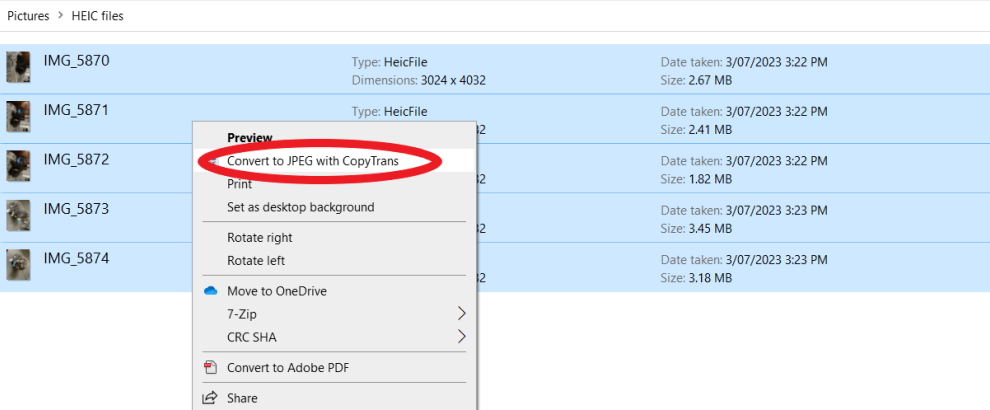
- Once you download and install this app, simply open File Explorer. Right click on an image that you want to convert and select ‘Convert to JPG with CopyTrans’. The new JPEG file will appear in the same folder.
- If you have multiple images to convert, highlight all of them in File Explorer by holding down the Ctrl key while selecting the images. Then right-click on one of them and select ‘Convert to JPG with CopyTrans’. All the new JPEG files should appear in the folder.
For Mac Users:
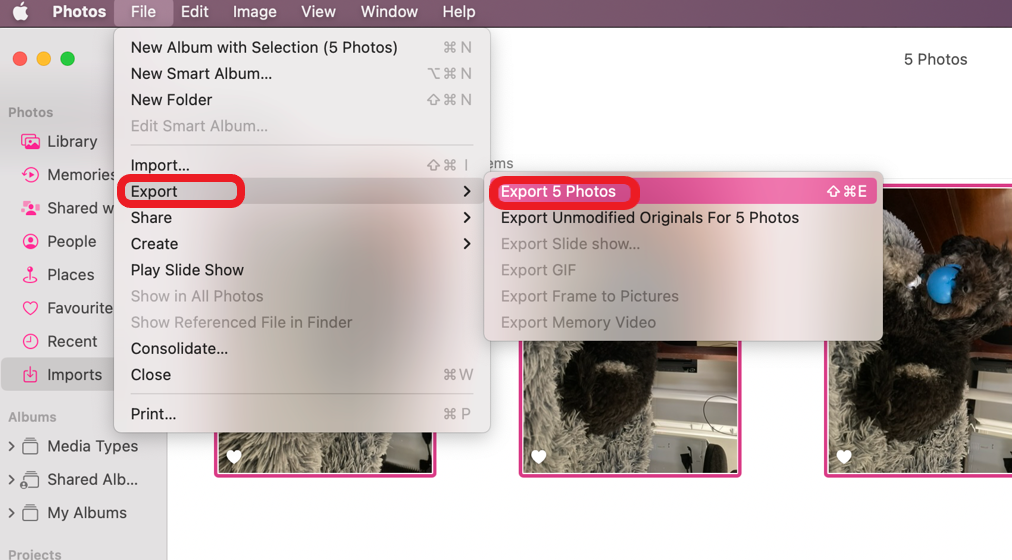
- Open the Photos App and highlight the photo(s) that you want to convert to JPEG.
- From the top menu bar, click ‘File’ then click ‘Export’ to export the photos.
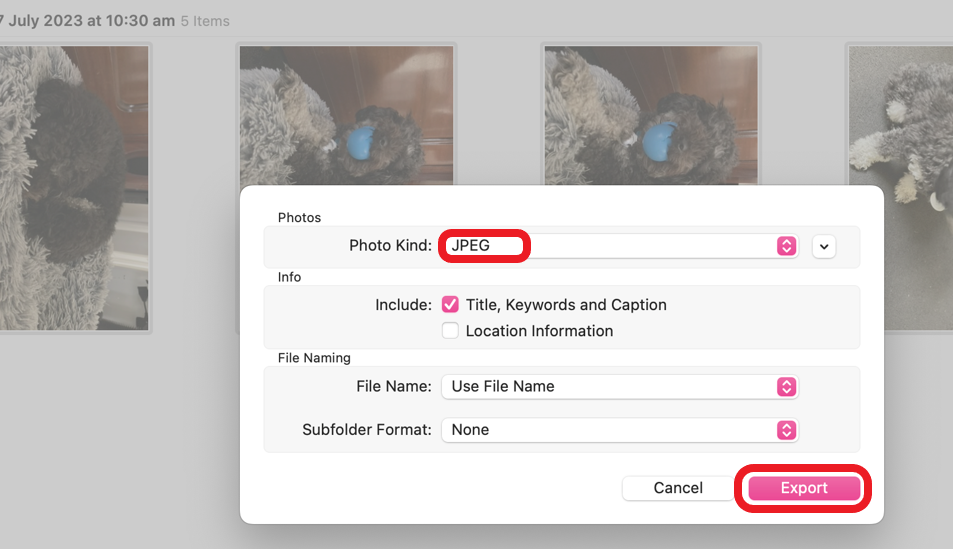
Then in the dialog box that appears:
- next to ‘Photo Kind’ select ‘JPEG’
- Next to ‘JPEG Quality’ select ‘Maximum’
- If there is a ‘Size’ option, select ‘Full Size’.
Then click ‘Export’ and choose the folder where you want to Export your photos. You will see in the progress bar when your photos have finished exporting to JPEG files.
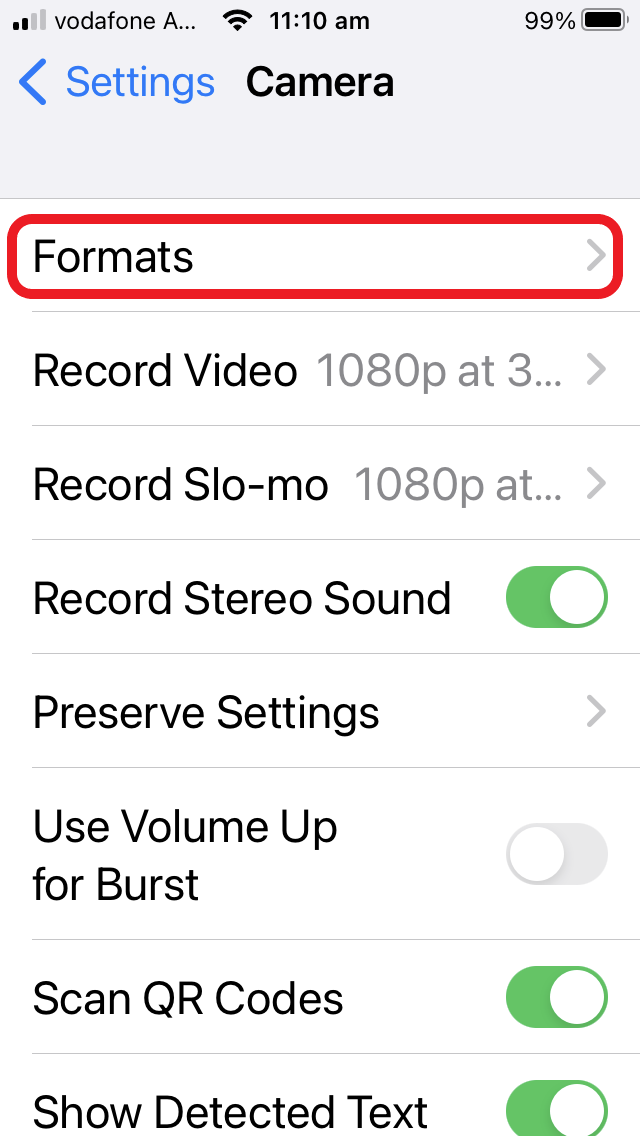
We also recommend that you update the Camera settings on your phone so that any future photos are automatically shot in JPEG format. The steps will vary depending on your phone manufacturer but here’s how to do it on an Apple iPhone:
- Open the 'Settings' app.
- Scroll down and select 'Camera'.
- Tap on 'Formats'.
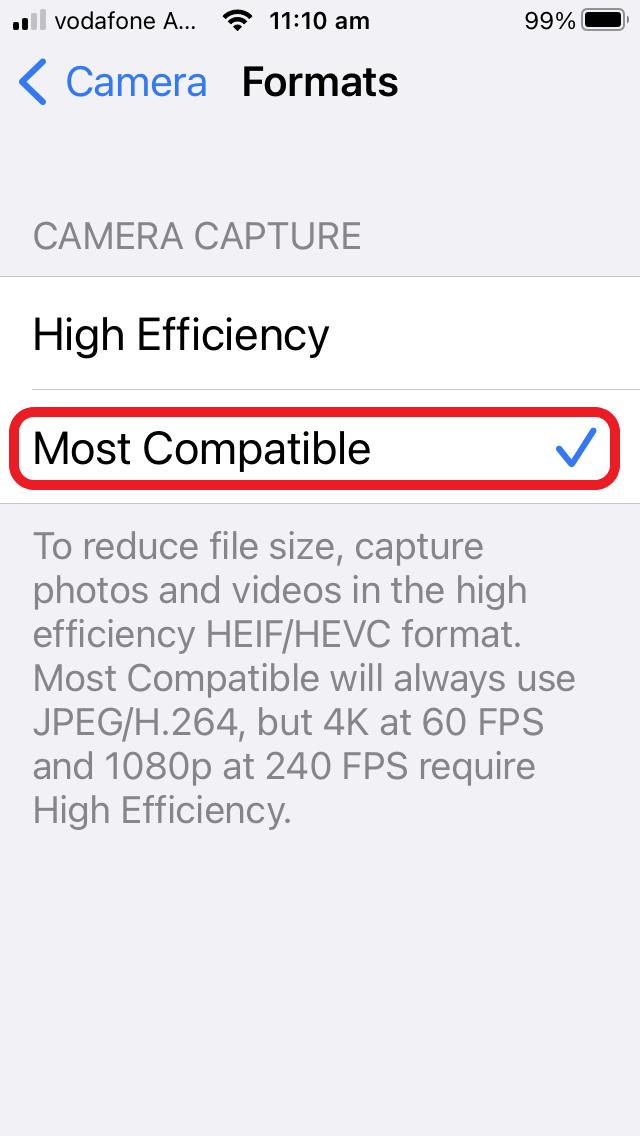
- Under the 'Camera Capture' section, tick 'Most Compatible'.
- Now, any new photos will be saved as JPEG files. However, this won't change your existing HEIC photos.